Chatbot
How to Build a Bot in 5 Simple Steps
What is a bot? How does it work? Is it complicated to implement?
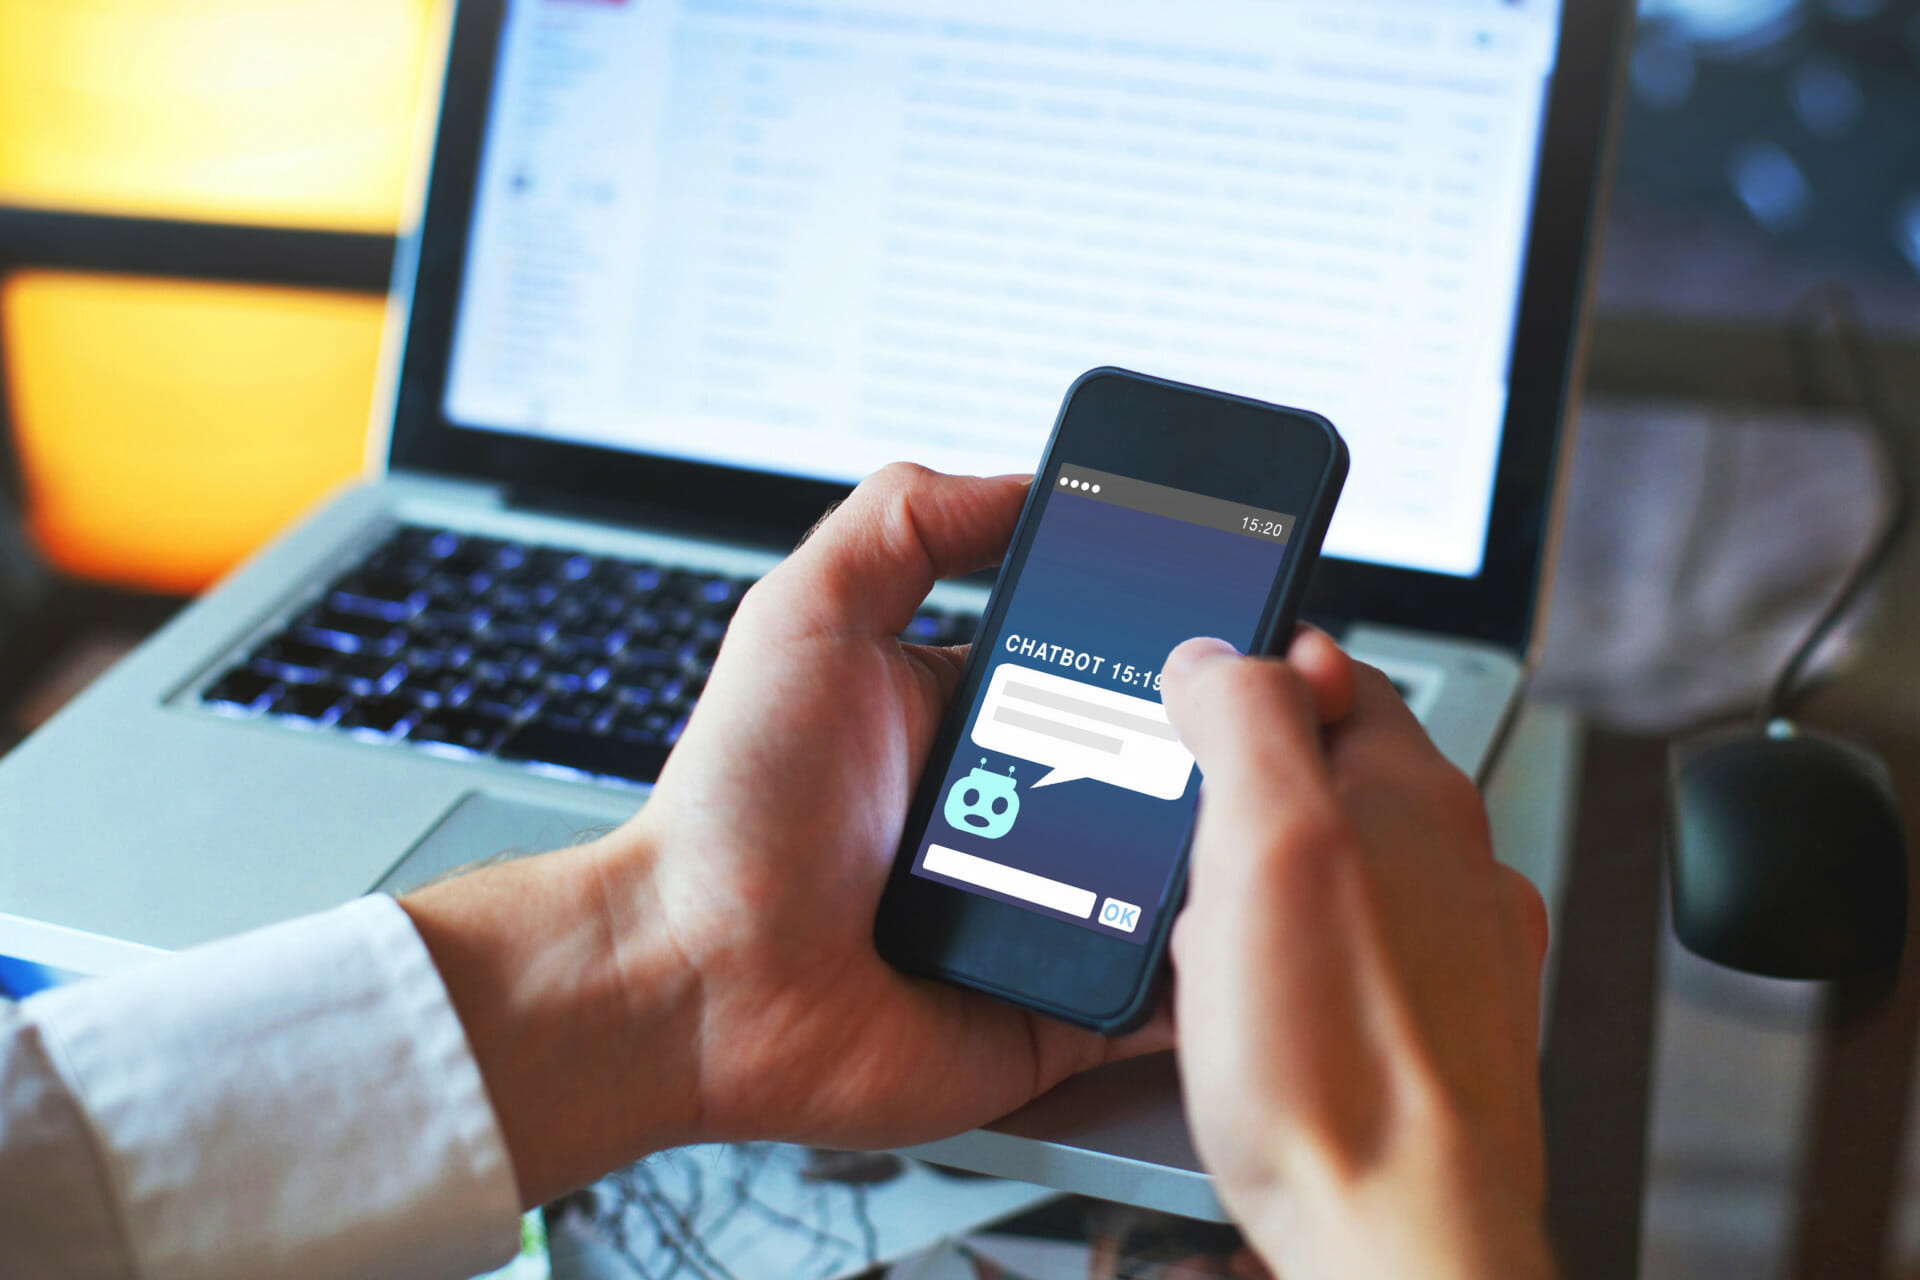
What is a bot? How does it work? Is it complicated to implement? One thing is for sure: there is a lot of hype and confusion about bots and their synonym chatbots. It seems that everyone wants to create one, but few companies have identified customised use cases they are pushing forward. We want to help you take the first step and learn about how to set up a bot, following some very straightforward advice and controller code.
A bot is nothing else than another way of presenting data- via written message or by voice. Here is a wrap up of the main technical functionalities:
- Bot communication can happen in text form, through apps such as Facebook Messenger or WhatsApp. It can also be voice-controlled, using devices and applications such as Amazon Alexa, Google Home and soon Apple Homepod.
- The user requests information through various commands, in the fashion of ’show me the product …’, ‘do I have any appointments today … ?’. Rather than the classic approach click -> next page -> click, bots follow a conversation.
- While communicating with the user, bots do not only need to interpret different ways of saying the very same thing, but similarly to a human dialogue, they also have to keep a record of what information the user has provided already to keep the chat focused and avoid repetitions.
- Bot responses are usually presented in a very compact way. For example in Facebook Messenger bots will often provide thumbnail images and links to the user.
Why Should Your Business Use Bots?
The advantage of a bot may not be immediate for all use cases, yet it is hard to argue its high potential for many businesses. First of all, the potential user base is huge. The number of Facebook Messenger users in the last three years has grown from 250 million to more than 1.2 billion.
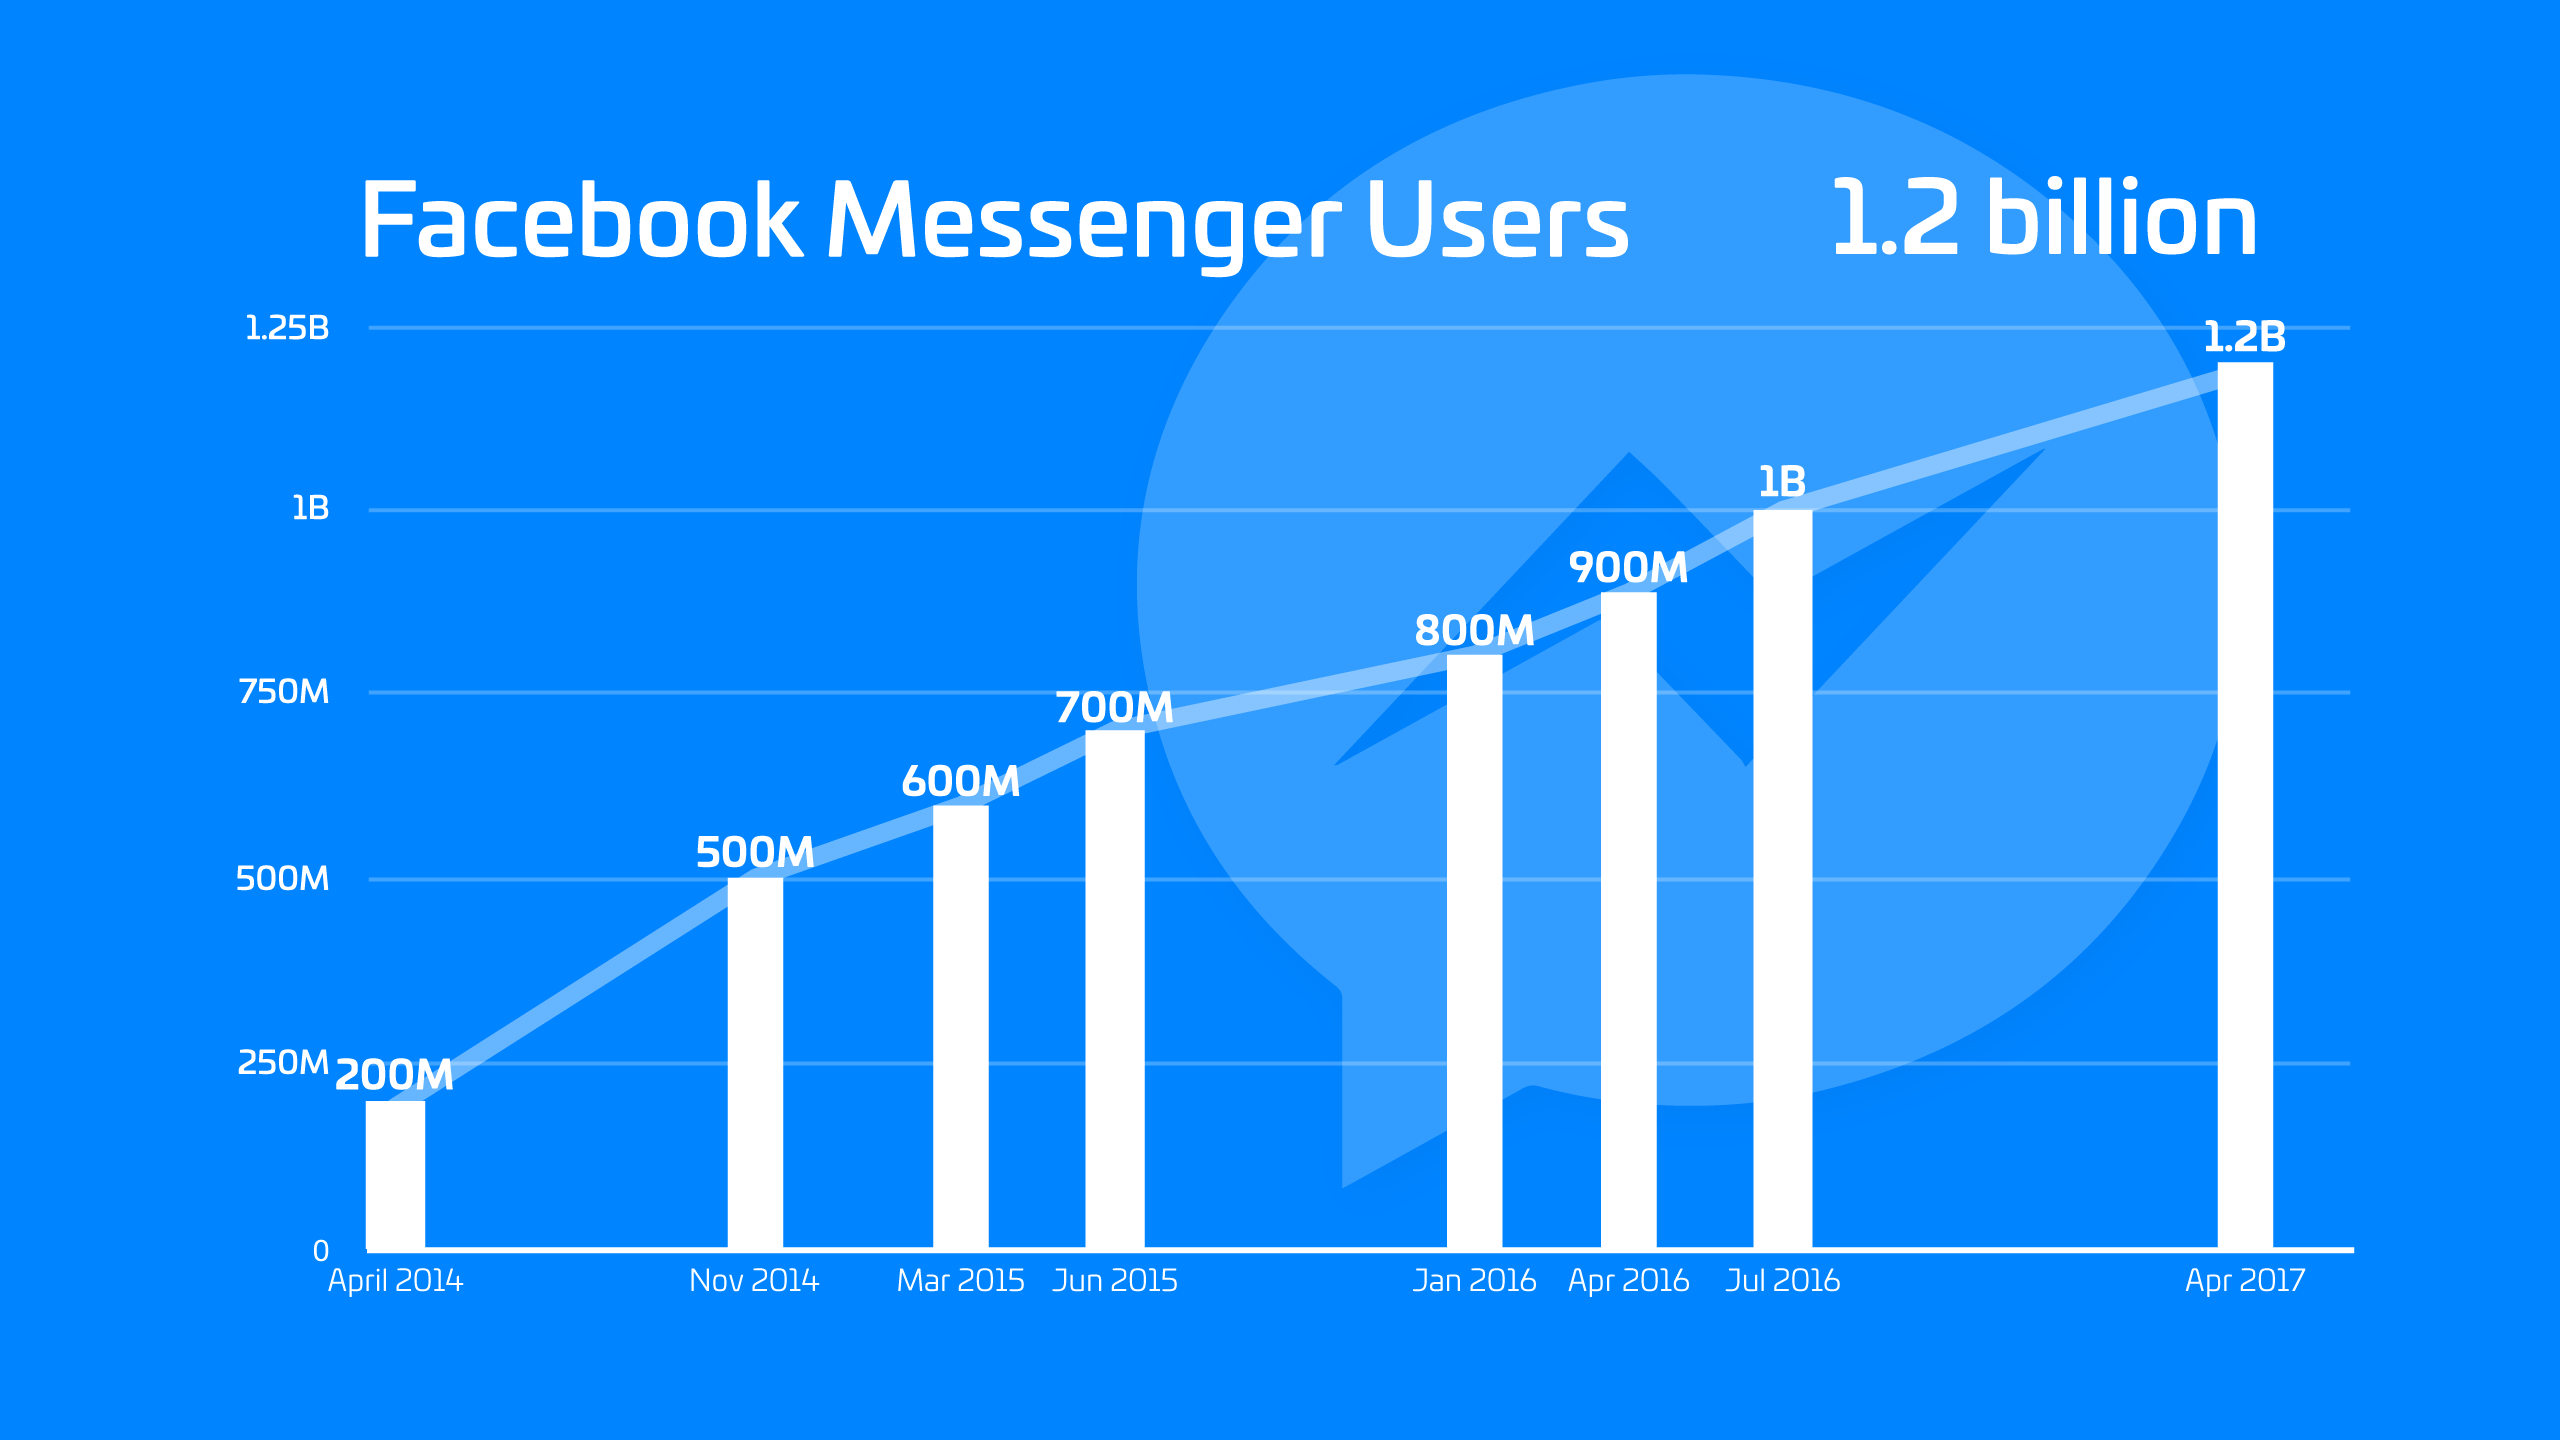
(Source: TechCrunch, 2017)
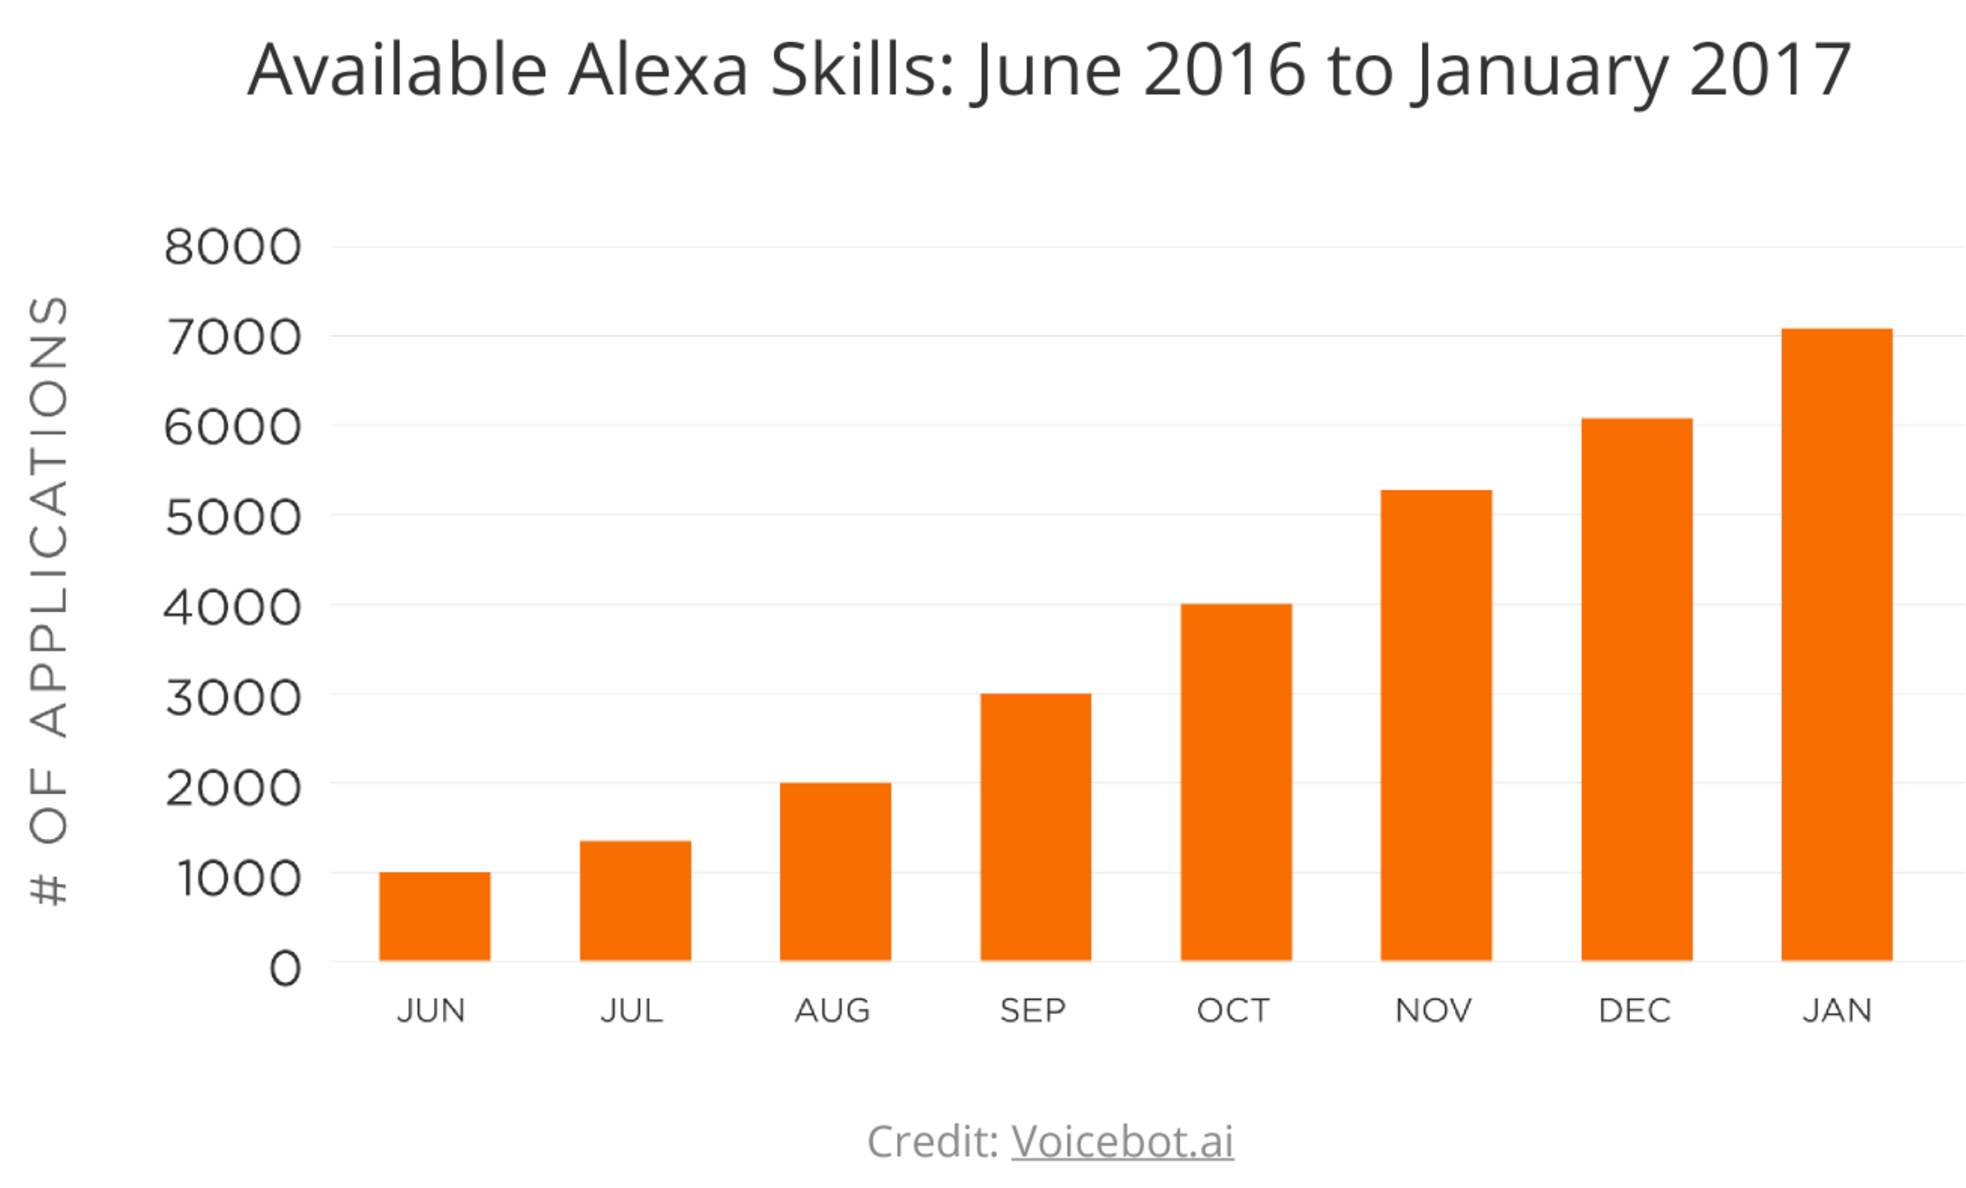
This development is supported by two additional factors: the shift towards mobile devices over desktop and the fact that younger generations are naturally adopting messaging systems as main communication channel. Looking at the statistics for the number of Alexa Skills-bots in Alexa are called ‘Skills’-the trend is following a similar path:
How Can I Start to Build a Bot?
Building a bot is actually easier than you may think. It all starts with developing the back-end with all functionalities the bot should have. The use case defines how the user can interact with the bot and what functionalities are required. Of course, the more complex the use case, the more complex it will become to develop the bot. Solutions, like the Spryker Commerce OS already can provide you with all the information that a bot will need, including the Product information, Cart and Checkout functionalities as well as Order Management and Shipping logic. In the next steps, we will show how you can easily create a simple Facebook Messenger Bot.
How to Develop a Facebook Messenger Bot
Building your first Facebook Messenger Bot is not complicated. The technical setup only requires a few steps to get you up and running. We dare you to try get your own bot online in 10 minutes!
Configuration
- STEP 1 – Set Up a New Page
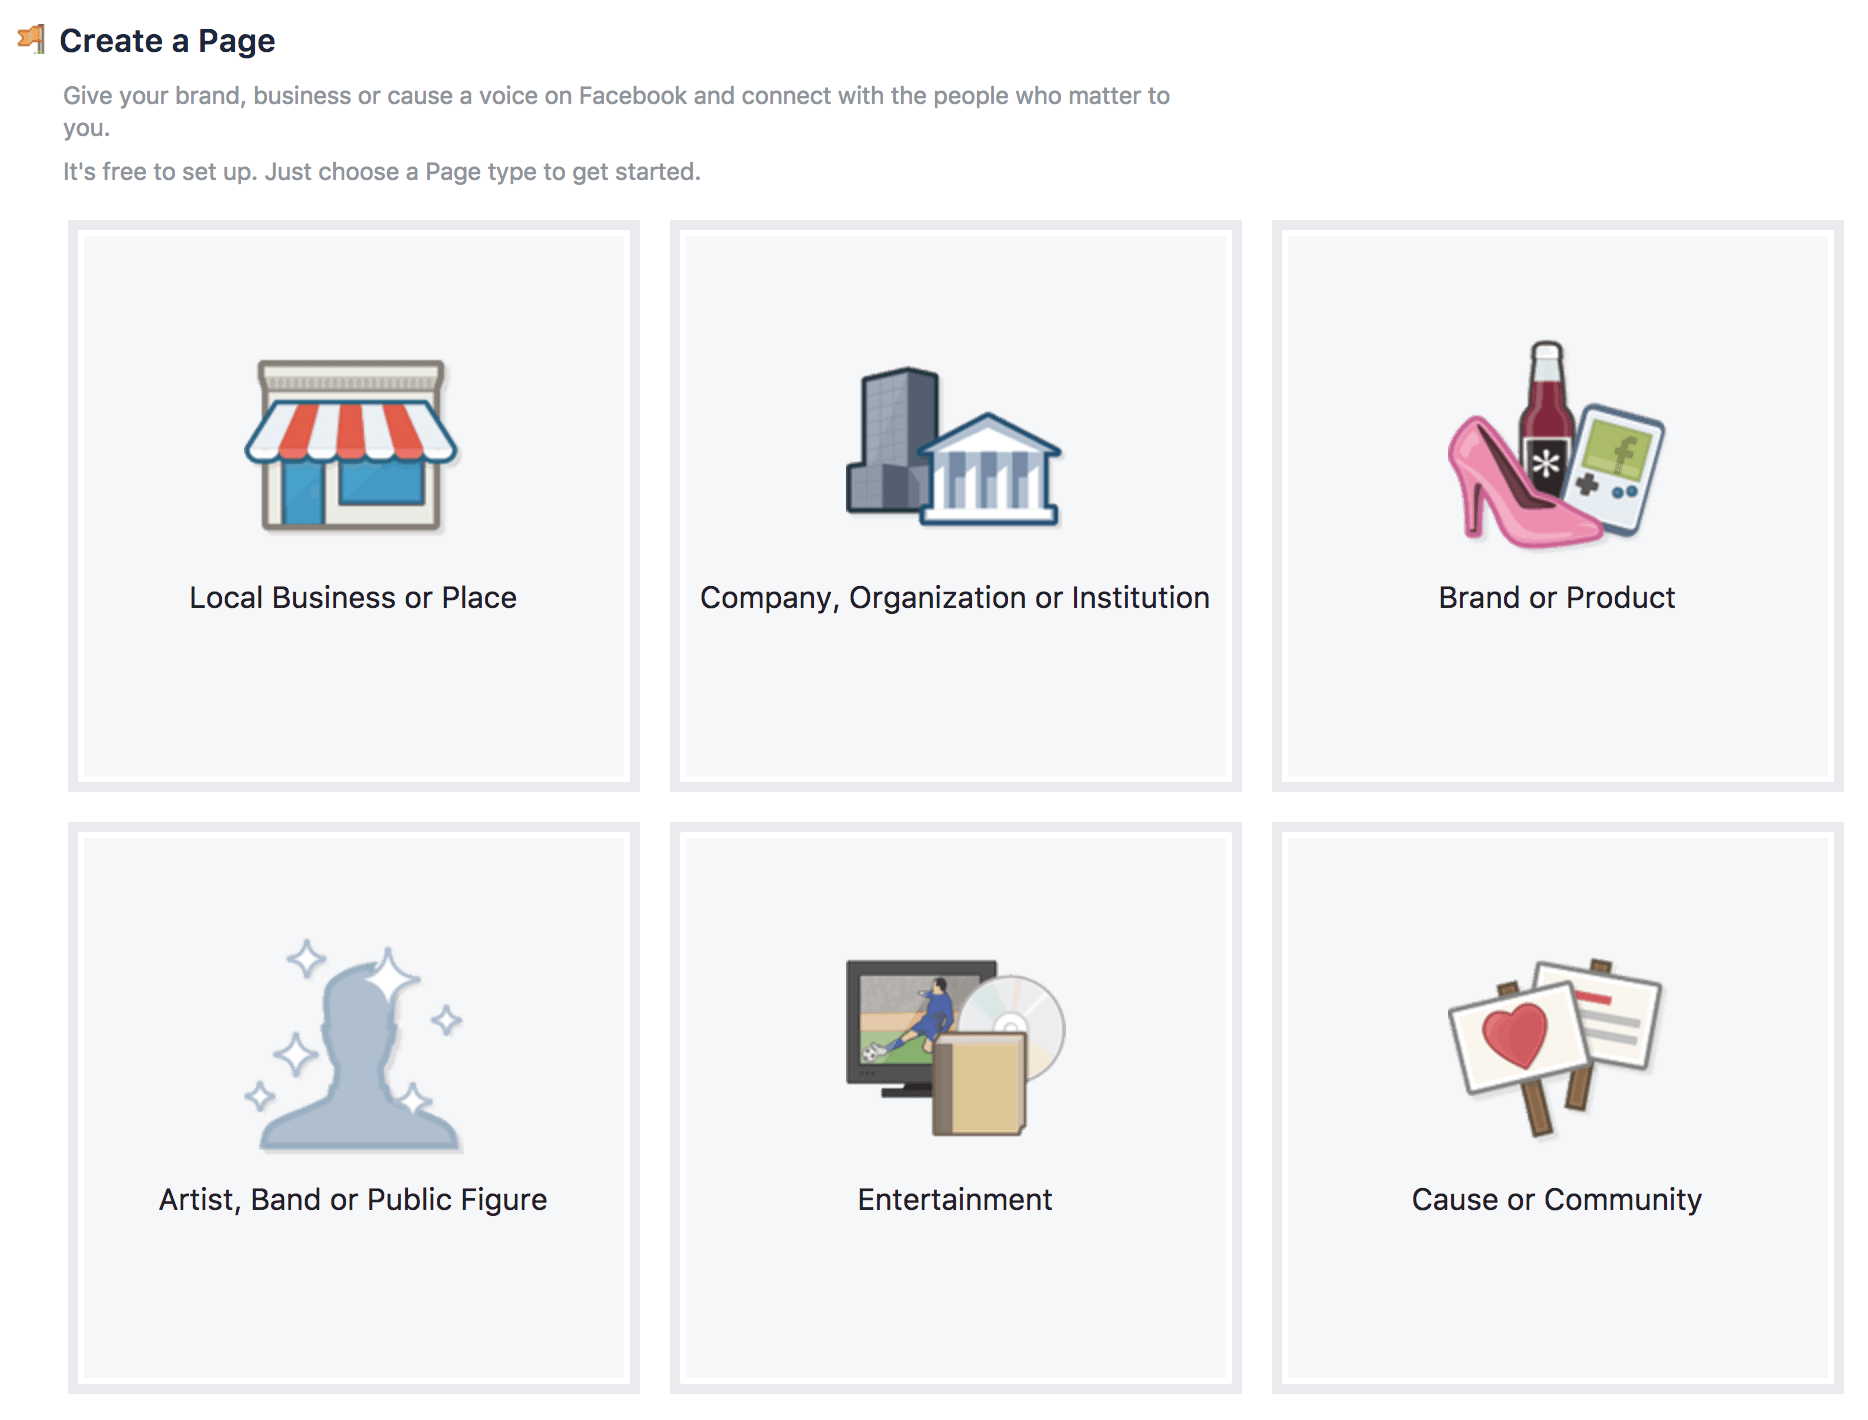
Firstly, create a new Facebook page. Rest assured, if you have an existing Facebook page, you can skip this step. The page is required in order to have an entity associated with your messenger bot. You will get a nice QR code associated with your bot persona, which you can use in advertising or even add to your business card.
- STEP 2 – Create a Facebook App
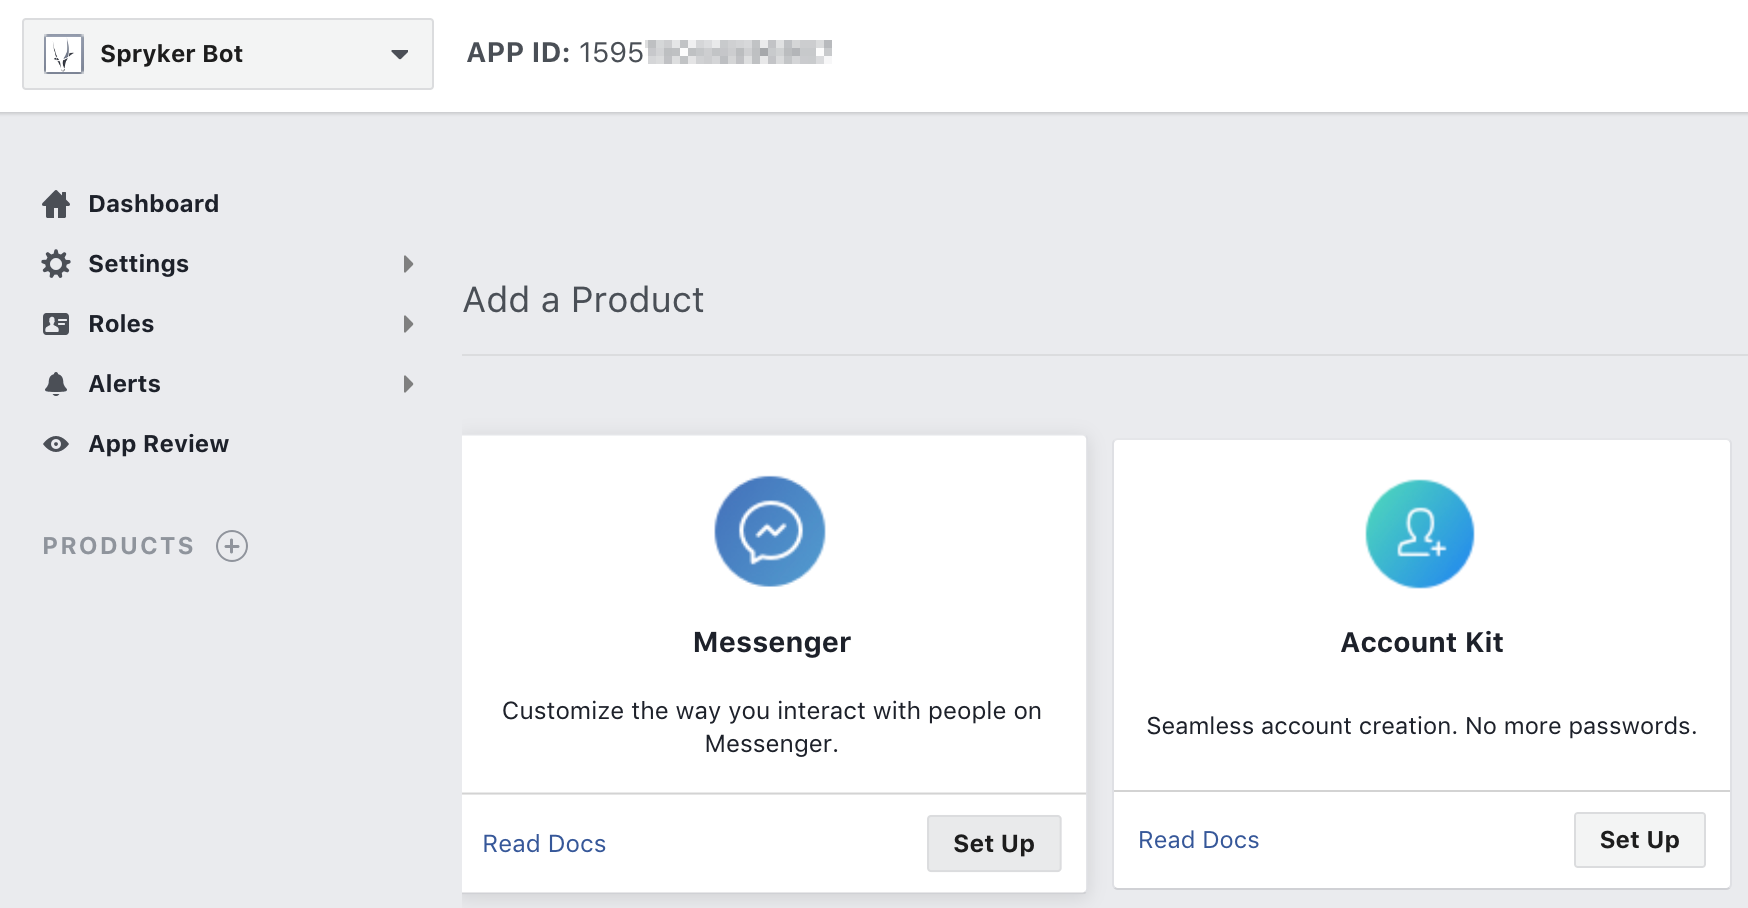
Next in line is creating a Facebook App. To do this, you need to access the Facebook Developer Portal, register and create a new App. Simply follow the steps and be sure to set up your App for the Messenger platform.
- STEP 3 – Get the Token
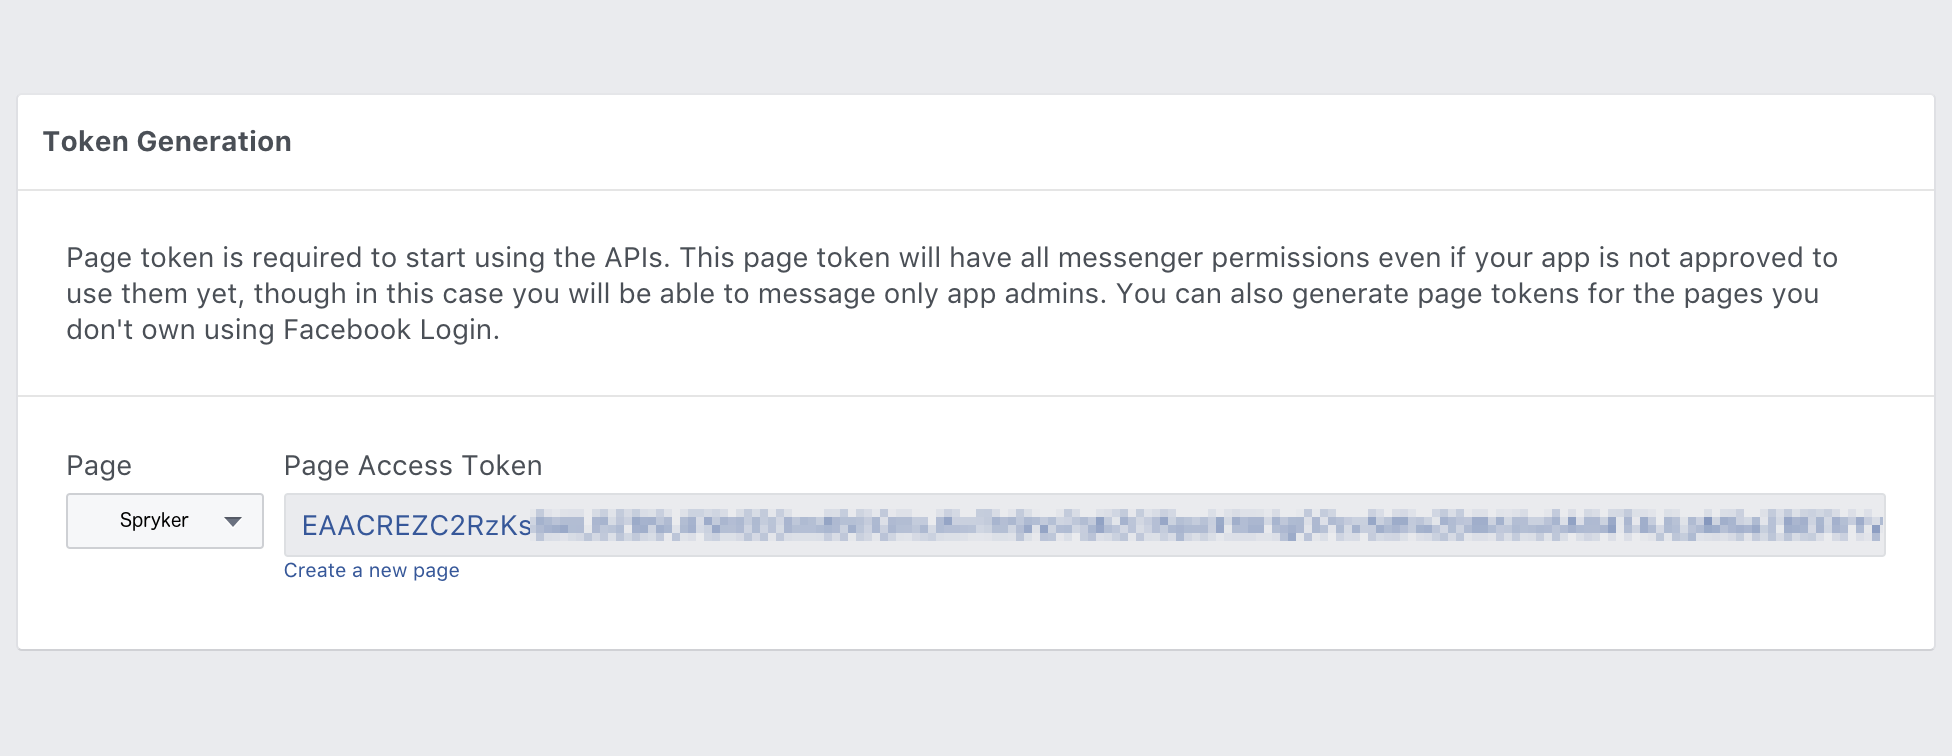
Once the App has been created, you need to cross-link your page and generate a token. This token will be used later in the process and will help to authenticate the requests from your bot to the Facebook platform. Make sure to keep the token handy somewhere, so you are ready to use it anytime.
- STEP 4 – Setup Webhooks
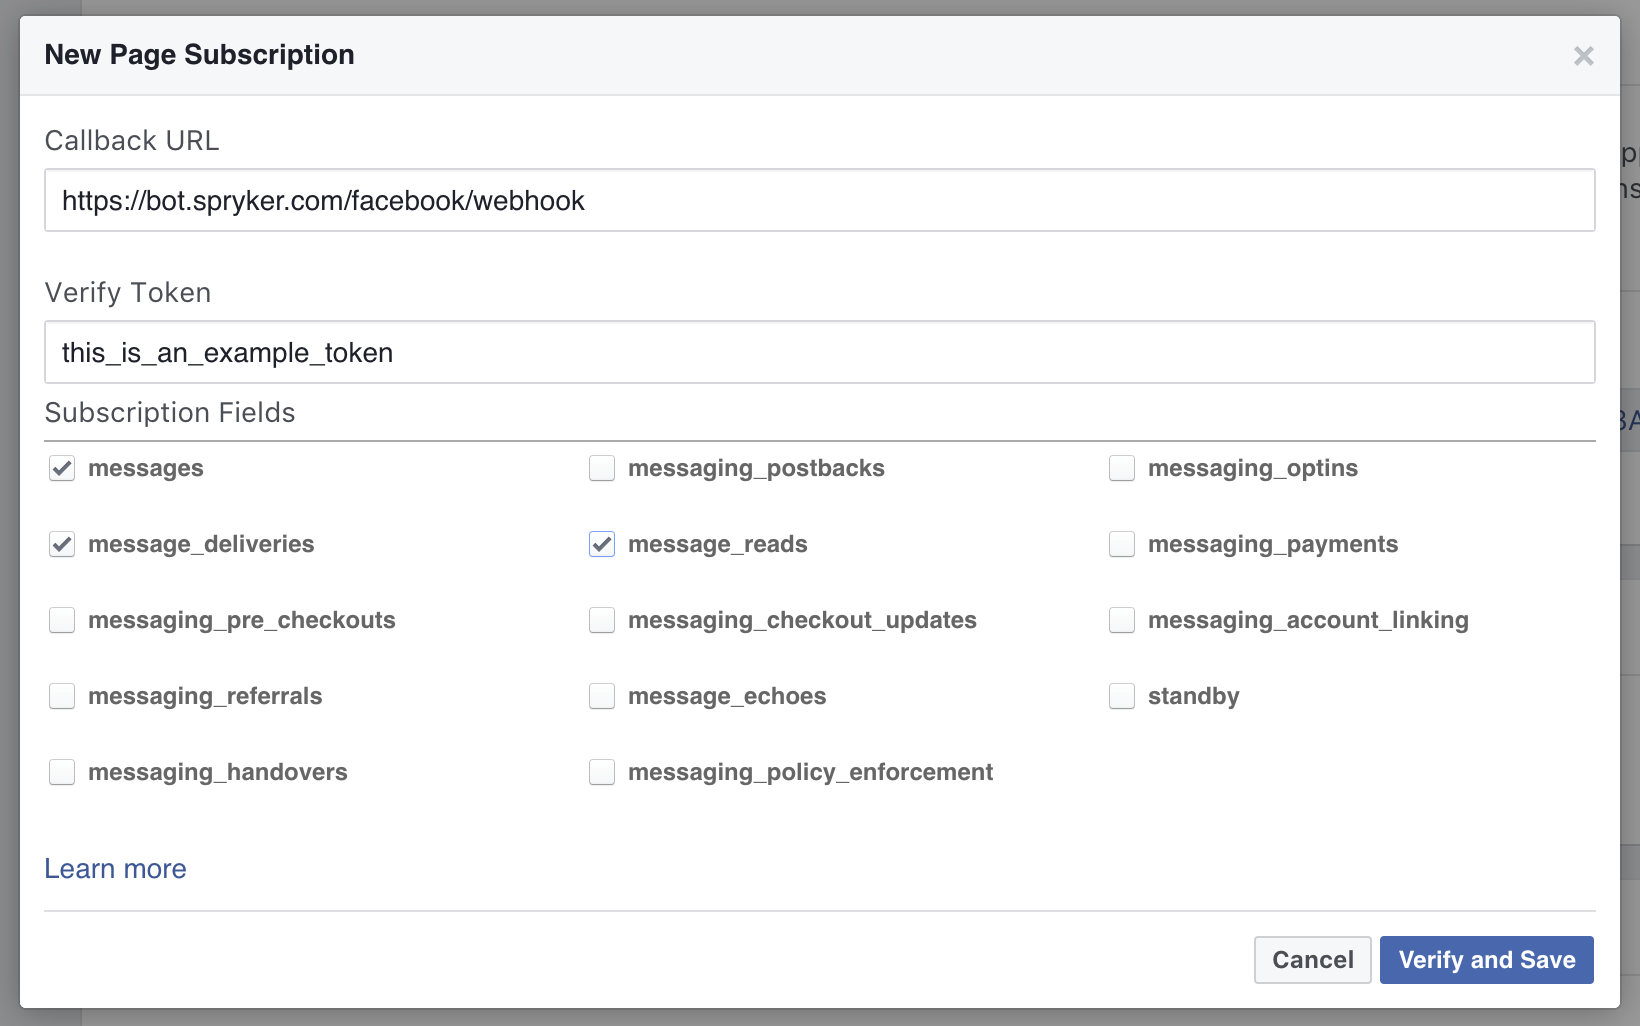
One of the last steps is to create a webhook and subscribe to the messenger events. Clicking the button Setup Webhooks, you will be asked for some more details (see illustration). To complete the setup, you will need a callback URL (your application), a string called verify token, and the ‘hooks’ you want to subscribe to. Choose the default ‘messages’ and optionally enable the status ‘read messages’ and ‘deliveries’. You can find a more detailed list here.
- STEP 5 – Connect App and Page
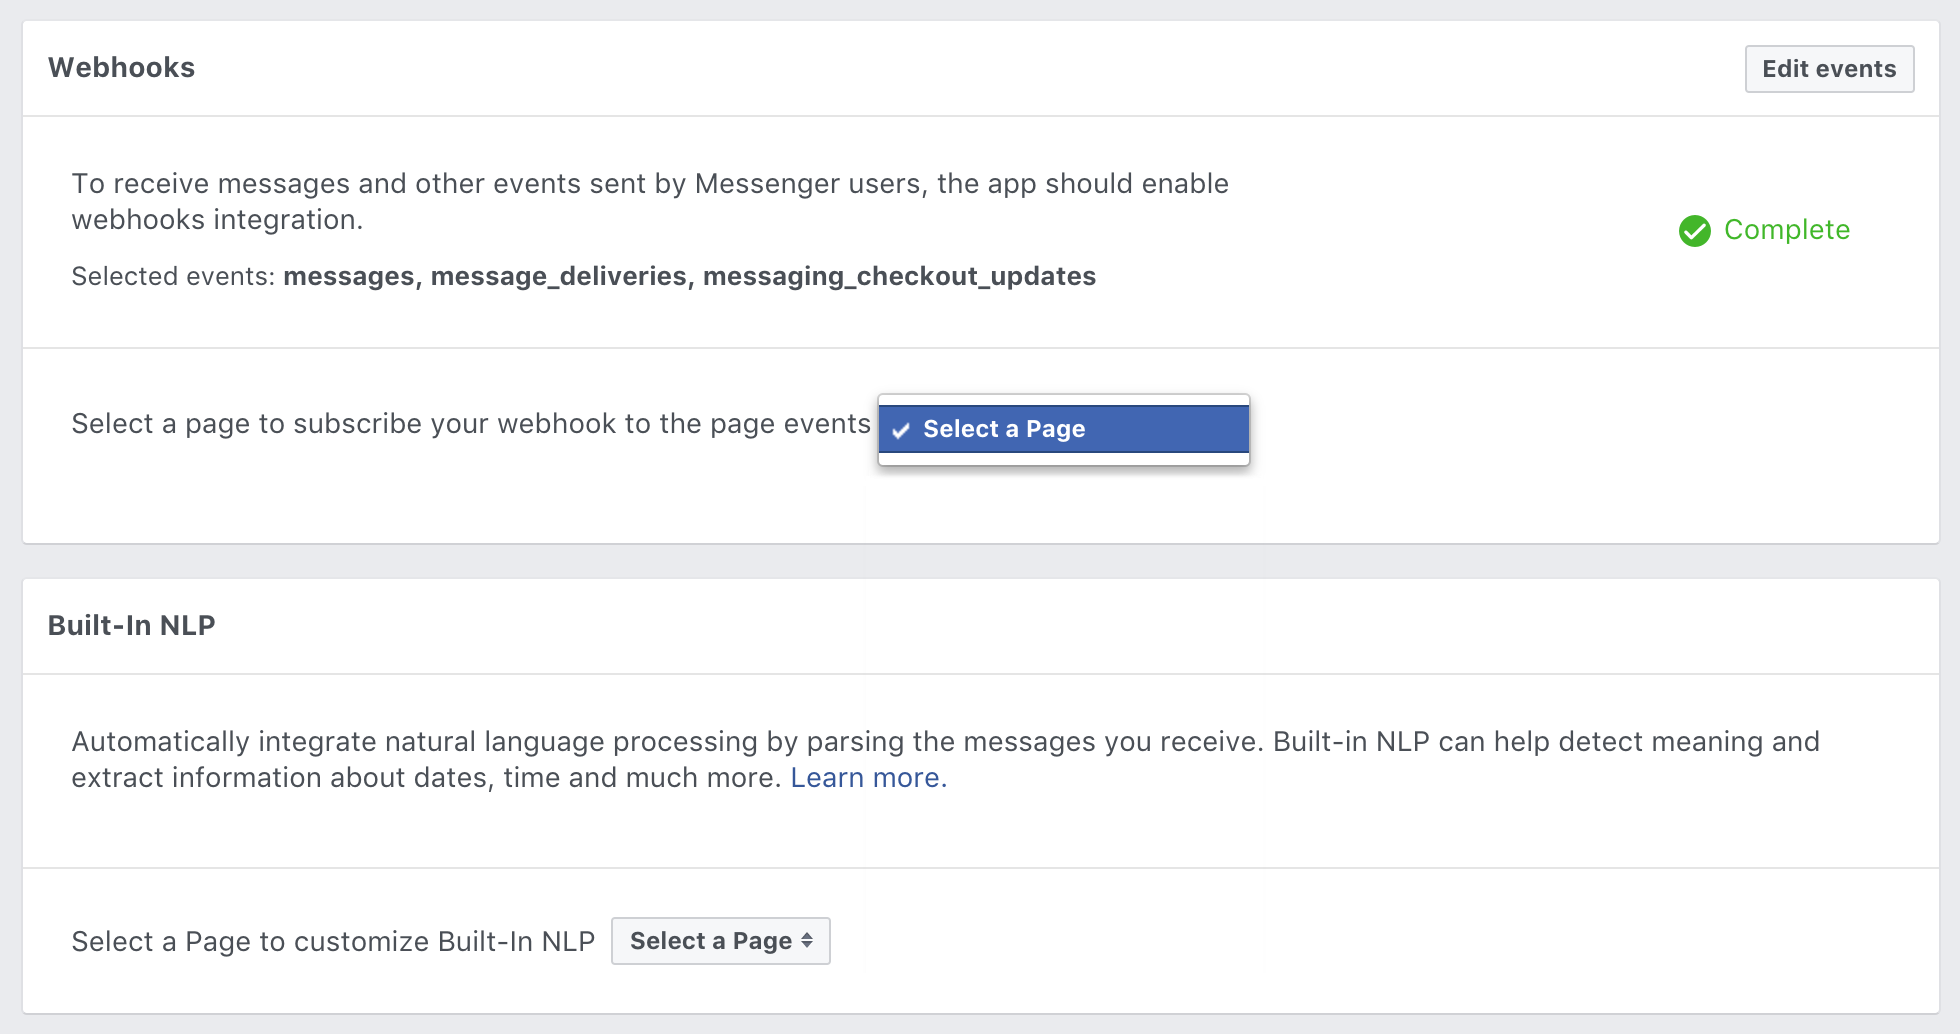
The final step here consists of associating these ‘hooks’ with your Facebook Page. This entails that the user can write directly to your page and get the reply directly from the bot. It sounds tricky, but this is the last action on the Facebook Developers portal and you can continue right with the controller steps below.
The Controller
1. Verify Token
As explained in step 4, once you set up Webhooks, you will need to add this extract of code to your controller, in order for the token to be verified. It will return the message Facebook sends and validate the URL of your bot.
$hubVerifyToken = null;
$verifyToken = ‘my_voice_is_my_passport’;
if (isset($_REQUEST[‘hub_challenge’])) {
$challenge = $_REQUEST[‘hub_challenge’];
$hubVerifyToken = $_REQUEST[‘hub_verify_token’];
}
if ($hubVerifyToken === $verifyToken) {
echo $challenge;
}
2. The Controller action
You are advised to divide the main Controller action (botAction) into some functions to parse and dispatch the incoming requests. This also serves as a method to send the response back to Facebook.
public function botAction()
{
$accessToken = ‘AXDF432…’;
$input = json_decode(file_get_contents(‘php://input’), true);
$sender = $input[‘entry’][0][‘messaging’][0][‘sender’][‘id’];
$message = $input[‘entry’][0][‘messaging’][0][‘message’][‘text’];
$reply = $this->dispatchMessage($message);
$this->sendResponse($accessToken, $sender, $reply);
}
3. Dispatch Message
Another function that will come in handy is a dispatch message. You can add any logic to it, helping you define how you want your bot to respond. Simply start with simple regular expressions and append dialog managers to make the interaction more fluid and ‘human’.
protected function dispatchMessage($message)
{
$message = strtolower(trim($message));
$response = [‘text’ => ‘Can you repeat?’];
$facade = $this->getDependencyContainer()->getProductFacade();
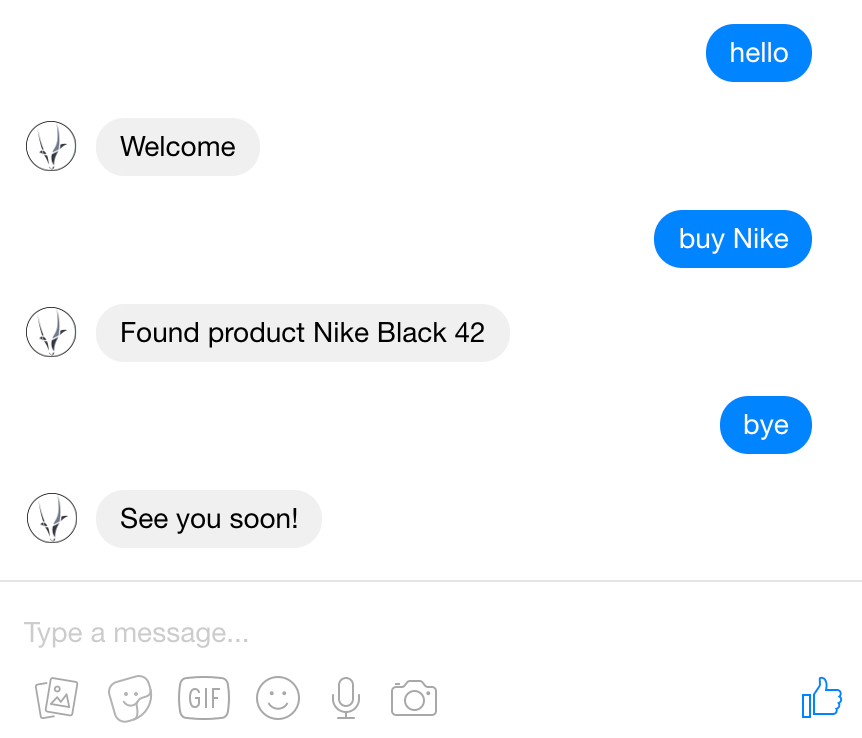
if ($message === ‘hello’) {
$response = [‘text’ => ‘Welcome’];
} elseif (preg_match(‘/buy ([A-Za-z]+)*/ ‘, $message, $matches)) {
$product = $facade->getProductByName($matches[1]);
$response = [‘text’ => ‘Found product ‘ . $product];
} elseif ($message === ‘bye’) {
…
}
return $response;
}
4. Send the response
The send response is the function you will need in order to format the reply and send it back to the user who is interacting with your bot. It’s a simple CURL request.
protected function sendResponse($accessToken, $sender, $reply)
{
$url = ‘https://graph.facebook.com/v2.6/me/messages?access_token=’
. $accessToken;
$ch = curl_init($url);
$jsonData = json_encode([
‘recipient’ => [
‘id’ => $sender
],
‘message’ => $reply
]);
curl_setopt($ch, CURLOPT_POST, 1);
curl_setopt($ch, CURLOPT_POSTFIELDS, $jsonData);
curl_setopt($ch, CURLOPT_HTTPHEADER, [
‘Content-Type: application/json’
]);
$result = curl_exec($ch);
curl_close($ch);
}
5. The bot at work
Using Ngrok
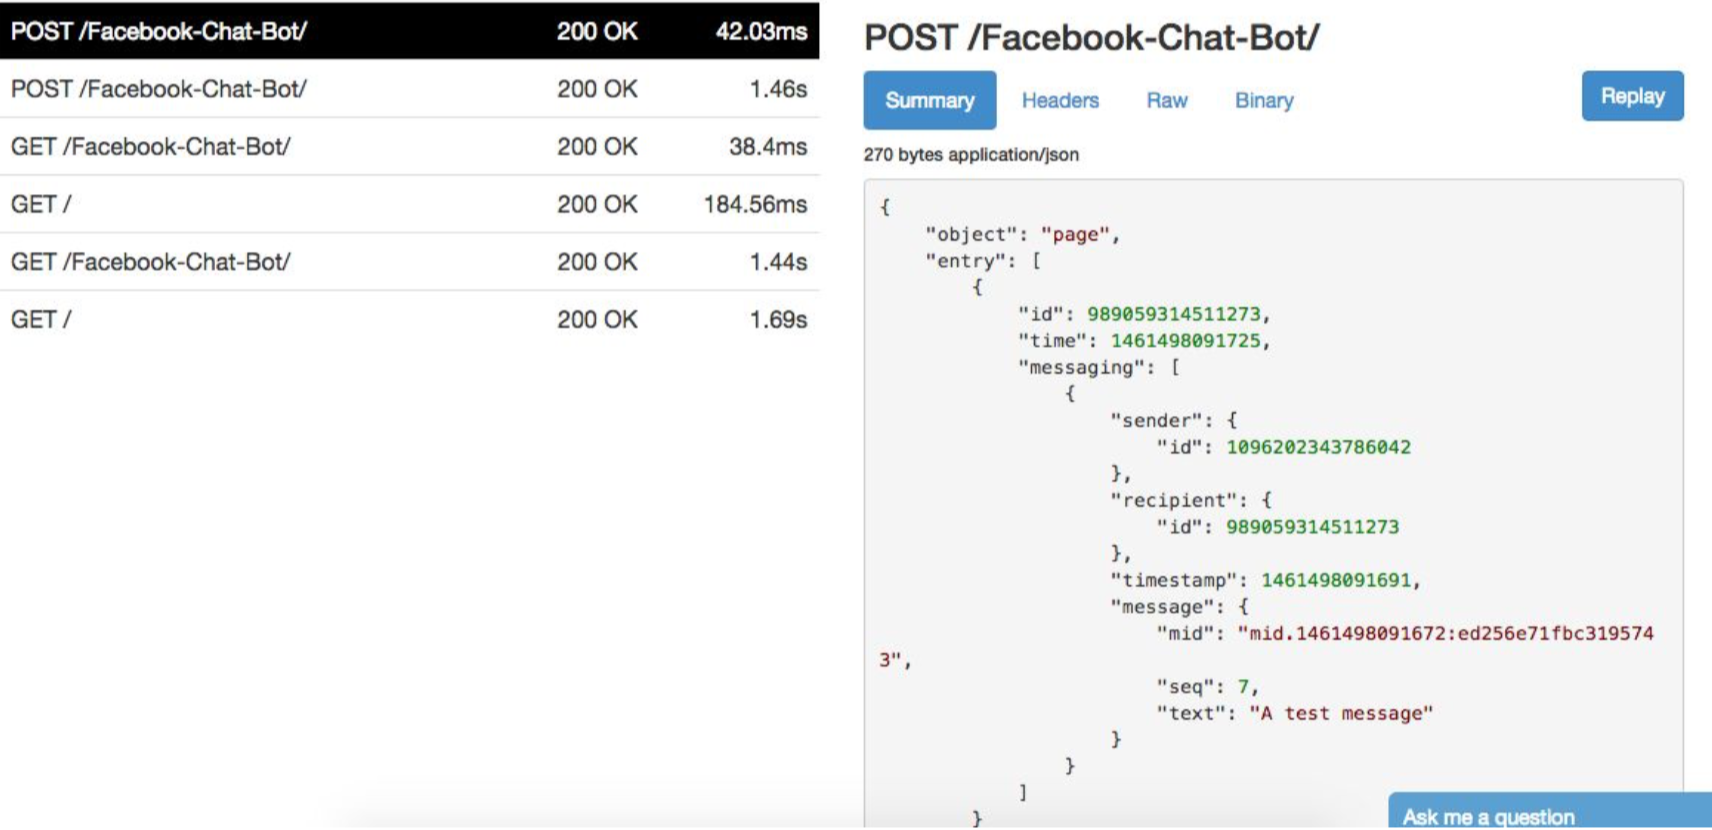
Developing on Facebook Messenger requires your server to use HTTPS. Also, your local system has to be accessible from Facebook. To tackle both requirements, you can use Ngrok. It is very easy to use and comes with a cheap monthly fee- for those among you that are not keen on the limitations of the free version. Once your web server is running and Ngrok is installed, just tunnel your local requests with the command:
$ ngrok http 80
And then use the debug monitor available at http://localhost:4040.
Hot Tip
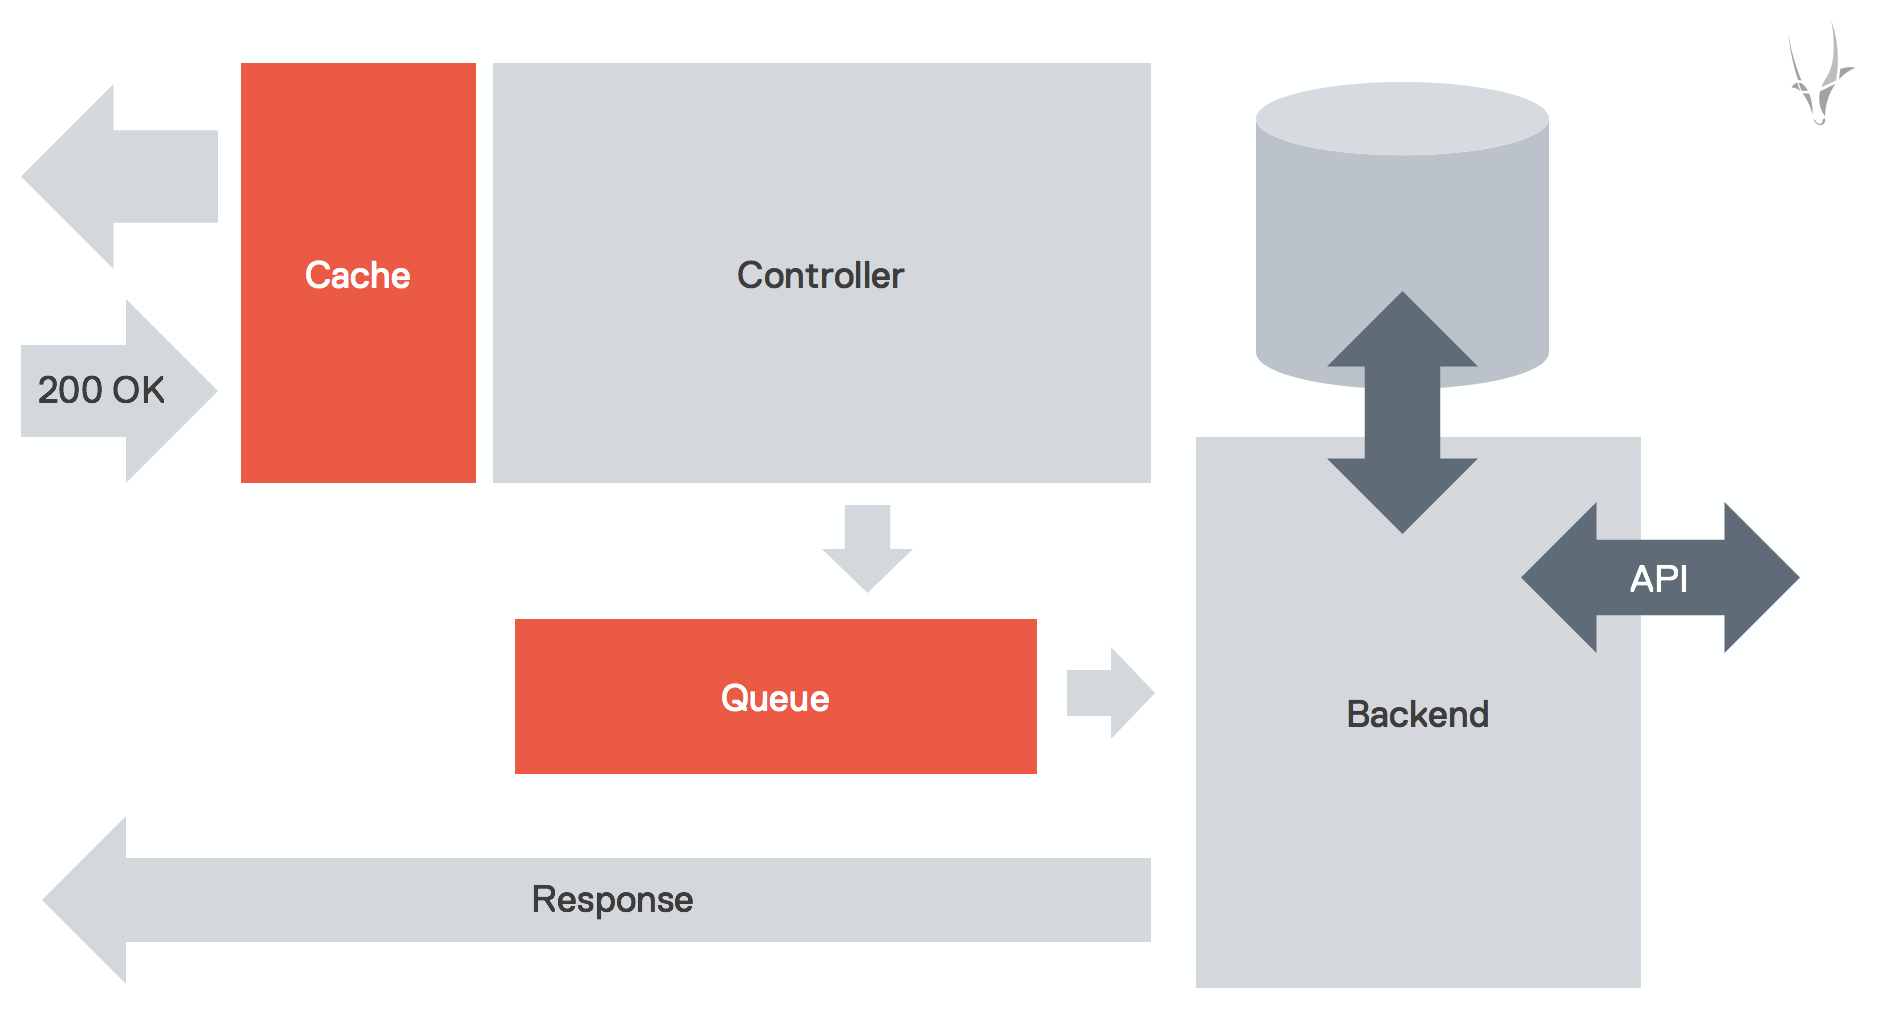
What we haven’t mentioned is that a Controller answering in real time to the Facebook Messenger is the simplest way, but it may not the best one. Facebook Messenger is actually waiting for an HTTP 200 response, indicating to the user that the bot has ‘read’ the message. Keeping this in mind, an architecture with a queue and an async processing is actually preferable. It makes the interaction with the user more natural and it will not jam the communication between your server and Facebook Messenger.
Some Final Advice Before You Starting Building Your Bot
- It is recommended to build both a test and a production environment, with a separate Facebook Page and Facebook App. Apps can create a test version, but those are usually limited and cannot be configured properly to run the test bot;
- A bot works better with a cache system. This ensures fast responses and avoids repetitions;
- While a Controller based system is simple to implement, the better way is to use a queue;
- Ngrok is a great tool and it is particularly useful during development and debugging. Learning to use it effectively can speed up the development process.
- Remember that in Facebook Messenger, URIs (for links or images) have to be in HTTPS and they should be registered via a separate API call.
- A bot usually collects all conversations in plain text. Make sure to use analytics and BI to record and evaluate these conversations. This will help you optimise bot-driven conversations and train Machine Learning algorithms.
- Bear in mind, you need to consider that the privacy of the user can never be associated with the Facebook ID and sensitive or personal data has to be anonymised or deleted.
Now, What Are You Waiting for?
- It’s easy to get started developing a bot. The interface on Facebook Messenger is very simple. A solid back-end will provide all the information you need to present to users;
- The back-end will be configured based on your use case. There is literally no limit in terms of how efficient and how complex you can design and keep on developing your bot.
- From using a Conversational State Machine to Machine Learning, the development of a bot is a continuous process that can perfectly cater to fit various use cases and different users’ needs.
Keen to find out more about how you can tackle these challenges? Drop us a line and we’ll get right to helping you with some free advice.